PolyCrowder


Contents:


General Overview
Planar Crowd Parameters
Planar Crowd Override Parameters
Polygonal Crowd Placer Parameters
Installation


General Overview

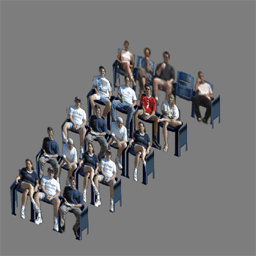
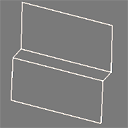
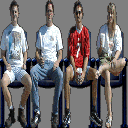
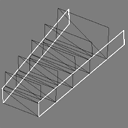
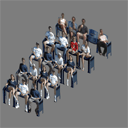
PolyCrowder creates randomly textured, evenly spaced rows of crowd on inclined 4-sided polygons of any shape. Crowd can be generated as texture mapped planes with the option of a tri-fold billboard for front rows (provides a lap for the people). Individuals can also be represented as singe face dummy objects or any selected object in the scene can be used instead (actual 3d people if desired). Textures are randomized by material ID as well as shifting of U and V texture coordinates. This script works best in conjuntion with using Multi-Sub Materials. The randomizer needs front row textures and back row textures to have consecutive material ID's in the material editor.Textures coordinates are adjusted from their real world size slightly one way or the other to insure that people are not cut off when the texture reaches the end of a polygon. Flat crowd representations can be optionally split and the ID changed when the number of people textured across the polygon reaches the total number on the width of the texture. This provides more randomization. The ends of flat crowd row representations can have optional chair sides mapped to their outer edges.

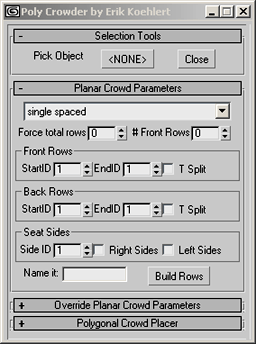
Planar Crowd Parameters  

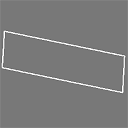
Start by pressing the pickobject button and selecting an edtable mesh. Then select a an inclined pair of connected faces that share an invisible edge ("quad"). An incline is necessary to provide a top and bottom to create the crowd between. The face normal direction is used to find right, left, and what direction the crowd will face.

Spacing Dropdownlist allows you to choose between Single Spaced, Double Spaced, or Triple Spaced rows of crowd. Double or triple spacing may be desired when the section of crowd is far away from the camera and less rows will not be noticed.

Force Total Rows allows you to specify the total number of rows to build up the inclined quad.


Front Row Parameters

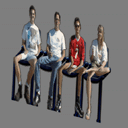
Front Row Geometry
Default Mapping
Four People Across
Mapped Geometry

Number of front rows allows you to specify the total number of frontal rows to build before the back rows are created.. Front rows contain extra planar geometry for a lap.

Start ID--Consecutive material IDs for front rows start here.

End ID--Material IDs are randomized between the Start ID and this one.

T Split--Will split the row geometry every four people. The next adjoining row section built will have a random material chosen between the Start ID and EndID.


Back Row Parameters

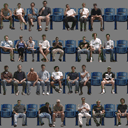
Back Row Geometry
Default Mapping
Ten x Four People
Mapped Geometry

Start ID--Consecutive material IDs for back rows start here.

End ID--Material IDs are randomized between the Start ID and this one.

T Split--Will split the row geometry every ten people. The next adjoining row section built will have a random material chosen between the Start ID and EndID.

Seat Side Parameters

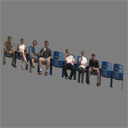
Seat Side Geometry
Default Mapping
One Seat Side
Mapped Geometry

Side ID--Material IDs for seat sides.

Right Side--Build seat sides on the right side of a section of crowd.

Left Side --Build seat sides on the left side of a section of crowd.

Name it--Allows you to name the output geometry

Build Rows Button --Builds row geometry with the parameters you have chosen


Planar Crowd Override Parameters


Use Override Values Checkbox--Use these values or not.

Crowd Height--Set crowd height in inches

Crowd Width--Set crowd width in inches

Eisle Distance--Set distance between rows in inches

Offset Distance--Offset front row this far up the incline.

Row Mapping Parameters--These parameters are for custom map setups that are different from the defaults.

People Across Texture--Number of evenly spaced people horizontally on the texture.

People Down Texture--Number of evenly spaced people vertically on the texture

Split Geometry Every n People--As the rows are being built, specify where in number of people the geometry should be split


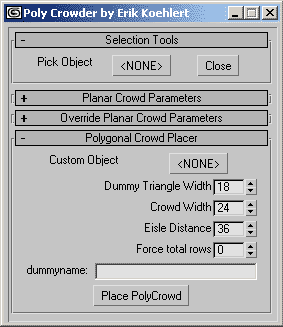
Polygonal Crowd Placer Parameters


Custom Object Button--Press the button and pick a custom object to be placed in rows by the PolyCrowder. The object should be at the origin with its pivot bottom center and facing down the Y axis. This overrides the default placement of dummy trianles that have a black front vert.

Dummy Triangle Width-- Specifies the diameter of a dummy triangle that will be placed.

Crowd Width--How much space between centers will be used when placing triangles or custom objects side by side along a row.

Eisle Distance--How much space between rows of custom objects or dummy triangles

Force Total Rows--Only build this many rows up the incline

Dummy Name--Name the new geometry this.

Place PolyCrowd Button--Build crowd using a custom object or dummy triangles.


PolyCrowder installation instructions

1. In Max click on MAXScript in the menu bar.

2. Click on Open Script.

3. Find and select the latest version of the PolyCrowder Script

4. If you want the script placed as a button under the Modeling tab in the tab panel do the following steps listed below. IF YOU DO NOT want the script as a button just select File and Evaluate All to start the script.

5. A small window should have popped up with the PolyCrowder Script once it was opened.

6. In this new window select Edit and Select All to highlight the script.

7. Click on the Modeling tab in the Tab Menu to display the tools in that tab.

8. Click on the highlighted script and while holding the button down, drag the script into an empty area of the Modeling tab.

9. A new button should have appeared in the Modeling tab tool set.

10. Close the Maxscript window.

11. Click on the newly created button to start the script.